Construction takeoffs define quantities. TakeCost is where those quantities are measured, organized, and prepared for pricing.
If you’re looking to understand what a construction takeoff is, see: How to Do a Construction Takeoff (Step-by-Step Guide).
This guide shows how the workflow is executed inside TakeCost, from starting a project to sending quantities into estimating.
Starting a Takeoff in TakeCost
There are two ways to begin, depending on how you manage your projects.
Option 1: Start from the Take-offs Tab
If you already have drawings and want to begin measuring immediately:
- Go to Take-offs in the left menu.
- Click New Takeoff.
- Enter the project title or job name.
- Upload your drawings.
- Click Continue to Takeoff.
This is the fastest way to start measuring when you’re focused purely on quantities.
Option 2: Start from Opportunities
If you manage bids and pipeline inside TakeCost, begin from Opportunities.
- Go to Opportunities.
- Click New Opportunity.
- Enter project details.
- Upload drawings.
- Launch the takeoff from there.
This approach keeps your:
– Client information
– Job details
– Takeoff
– Estimate
– Proposal
All tied to one tracked opportunity, providing better pipeline visibility and organization.
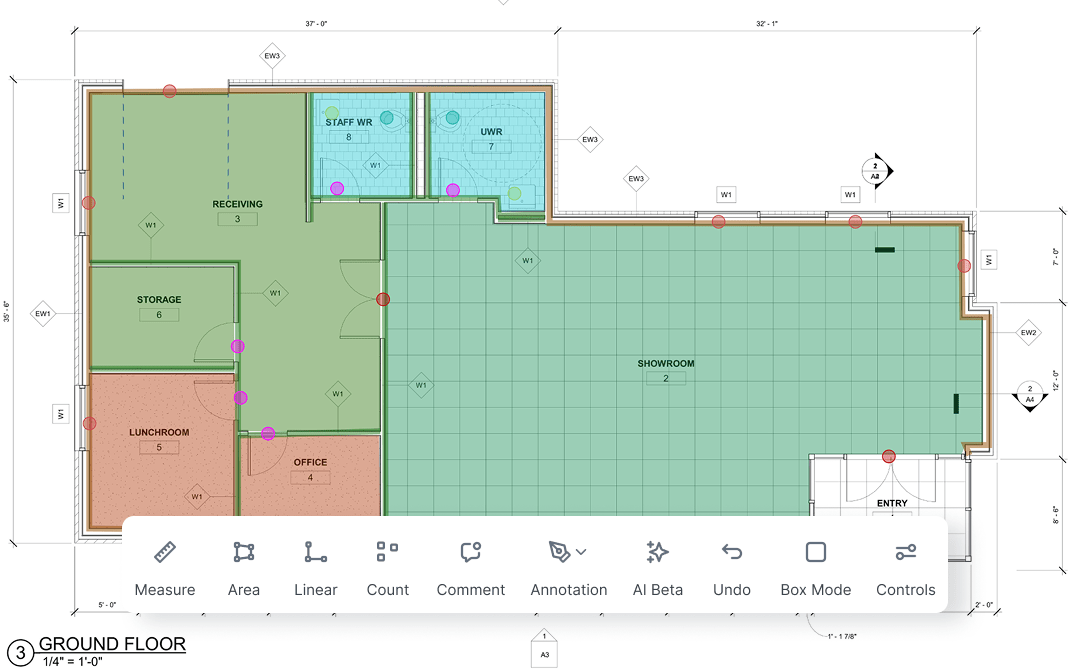
Step-by-Step: Performing the Takeoff
Step 1: Confirm the Scale
Before measuring:
– Set or confirm the drawing scale.
– Zoom into the correct sheet.
– Validate dimensions for accuracy.
Accurate scale is the foundation of an accurate takeoff.
Step 2: Choose a Measurement Tool
TakeCost provides tools tailored to each scope:
Linear Tool
– Walls
– Framing
– Edges
– Perimeters
Area Tool
– Slabs
– Flooring
– Roofing
– Surface materials
Counter Tool
– Doors
– Windows
– Fixtures
– Anchors
Counting methods include:
– Manual clicking
– Text Match
– List
– Symbol Match
These features make repetitive counting faster and more accurate on large plans.
Step 3: Assign or Create Materials While Measuring
Every measurement is tied to a material. You can:
– Select an existing item from the catalog
– Create a new material instantly
When creating a material, you can define:
– Material name
– Coverage type (sqft, pallet, linear ft, etc.)
– Cost per purchase unit
– Waste factor
– Metric or Imperial units
– Rounding rules
There’s no need to configure your entire catalog in advance, materials can be created as you measure, keeping the workflow efficient and natural.
Step 4: Use AI-Powered Tools to Accelerate Takeoffs
TakeCost integrates artificial intelligence to reduce manual work and improve efficiency.
AutoScale Sheets
Automatically detects and calibrates drawing scales from plan notes, minimizing setup time and human error.
Auto Sheet Naming
Reads title blocks and organizes sheets automatically for faster navigation and better project organization.
Symbol & Item Counting
Automatically counts repeated symbols such as doors, windows, fixtures, and outlets, saving hours on large projects.
1-Click Elevation Takeoffs
Instantly measures walls and elevations using AI-powered computer vision—ideal for façade and exterior scope measurements.
AI Elevation Tool (Beta)
Currently available for elevation sheets, this feature assists with repetitive measurements. Users review and confirm quantities to ensure accuracy.
These AI tools enhance productivity while keeping estimators in full control.
Step 5: Review Quantities
After measuring:
– Review totals per material
– Confirm scope completeness
– Make adjustments as needed
All quantities remain organized under their assigned materials, eliminating manual data transfers.
No exporting, no re-entering numbers.