
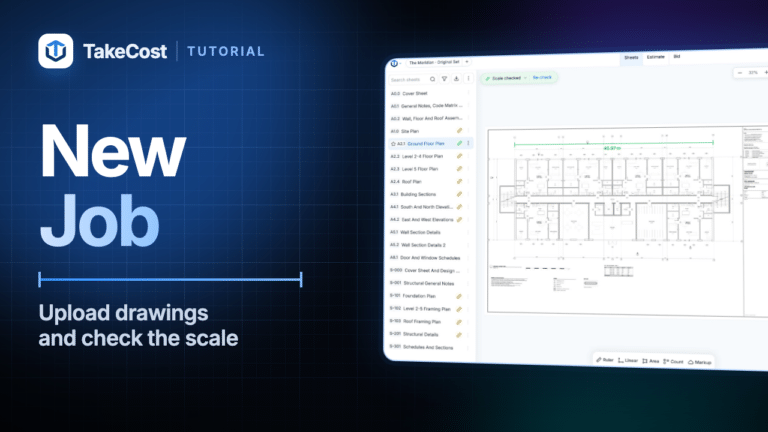

A construction takeoff in TakeCost takes ten steps: create a project and upload your drawings, check the scale, see what TakeCost found on the sheet, measure with Linear, Area and Count, add Smart Scopes, mark up the drawing, then price the estimate and download the proposal. Every quantity stays linked to the shape you drew.
Start here: the first TakeCost tutorial (2:42) covers steps 1 and 2. Each step below links to its own short video.
New to takeoffs in general? Read what a construction takeoff is and the general step-by-step takeoff guide first. This guide is about doing it in TakeCost.
Key takeaways
- TakeCost reads your drawings for you: it names every sheet from its title block, reads the scale and lists the wall types, doors and windows it finds under On this sheet.
- Check the scale against a printed dimension before you measure. A wrong scale carries into every quantity.
- Linear measures runs, Area measures surfaces and Count counts items, by hand, by symbol or by text.
- Smart Scopes turn a measured wall into materials, such as studs and top and bottom track.
- The Estimate prices every line from your Catalog, and the Proposal is built from what you priced.
Step 1: Create a project and upload your drawings
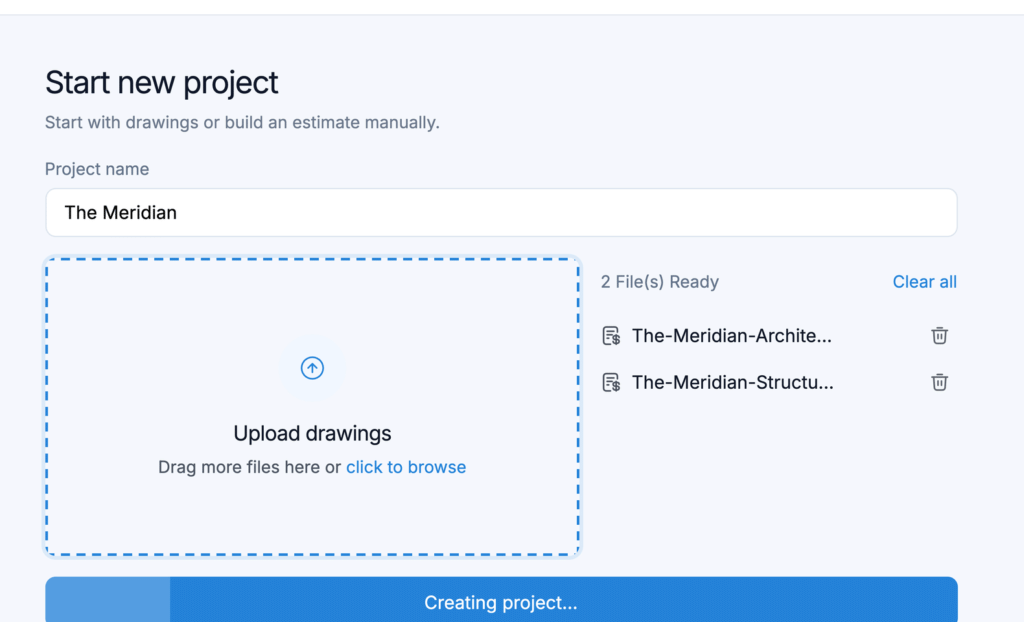
- On the Take-offs page, click Create Project.
- Type a Project name and choose Upload drawings.
- Drop in your PDFs: a full set, single sheets or a few disciplines at once.
- Click Create project.
TakeCost splits each PDF into one sheet per page and names every sheet from its title block. Search finds sheet names and any text printed on the sheets, such as a note or a tag.
No drawings yet? Choose Start from estimate instead and build the estimate by hand. You can add drawings to the same project later.
Step 2: Check the drawing scale
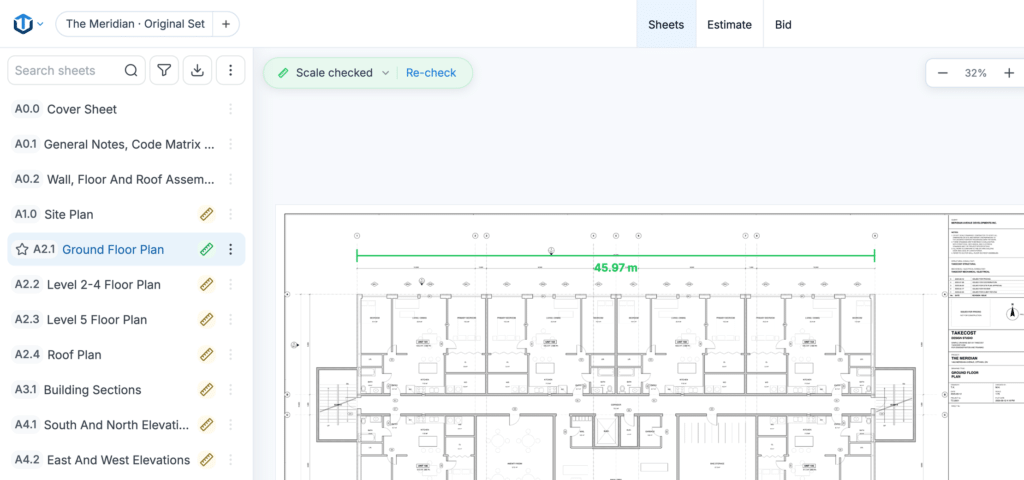
TakeCost reads the scale off each sheet. A yellow ruler beside the sheet means it found the scale but nobody has checked it yet; green means it’s checked.
- Open the sheet and click Check beside the scale at the top left.
- Click both ends of a long dimension printed on the plan.
- Compare the plan dimension with what TakeCost measured. If they match, click Yes, it matches.
The scale now reads Scale checked, and every measurement on that sheet reads true. Check each sheet you measure on.
Step 3: See what TakeCost found with On this sheet
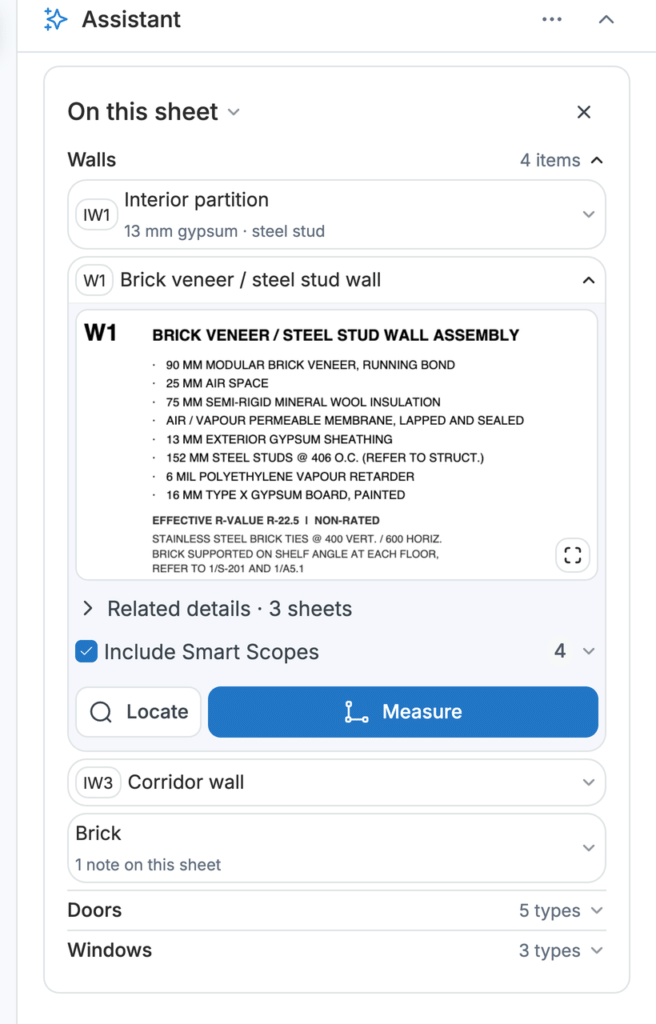
Before you measure, look at On this sheet, at the top of the Assistant panel. TakeCost reads the drawing and lists its Walls, Doors and Windows.
- Open a door type to see its size and how many the schedule lists. Locate lights up every door of that type on the plan, and View schedule opens the door schedule over the plan.
- Open a wall type to see its assembly, layer by layer, with Related details on the other drawings.
- Click Measure on a wall type, and Linear starts with the measurement already named after it.
Step 4: Measure walls and runs with Linear
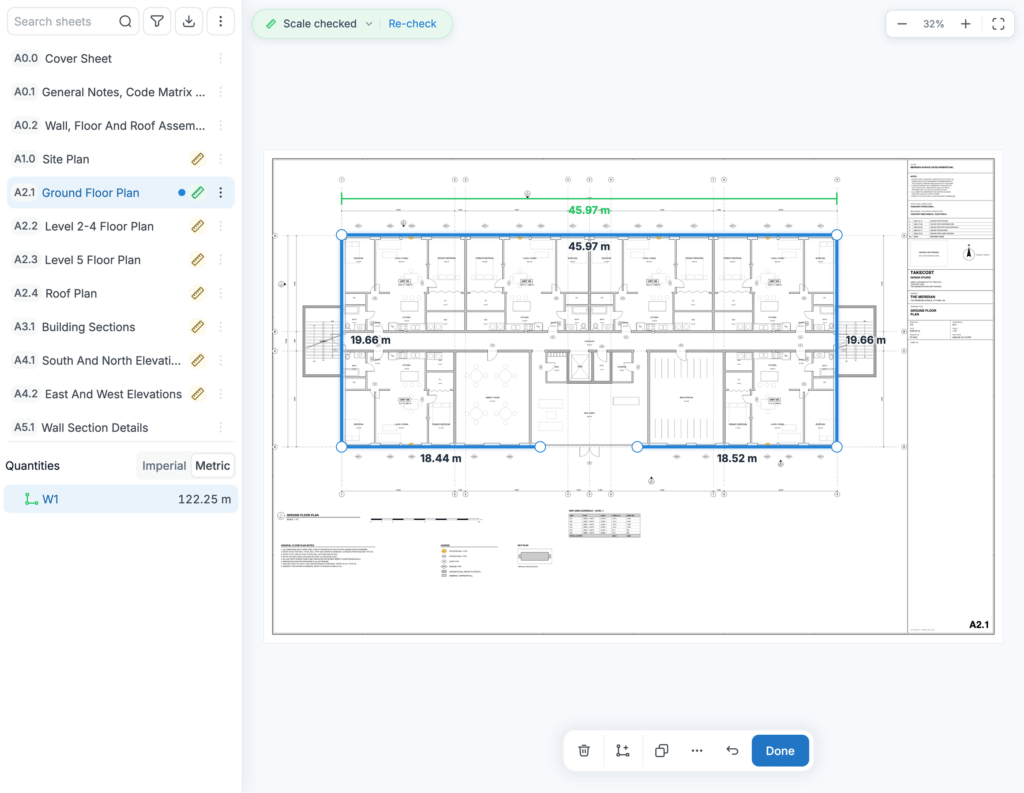
Linear measures anything that runs in a line: walls, footings, pipe, conduit, baseboard, curbs.
- Click Linear on the toolbar at the bottom of the sheet, or start from a wall type in On this sheet.
- Click each corner, then click Finish or press Enter.
- For a room, use Draw boxes (B): one drag puts in all four sides, each with its length.
A wall needs a height for its face area. In Line Properties, choose Wall and type the Wall Height.
Step 5: Measure floors and surfaces with Area
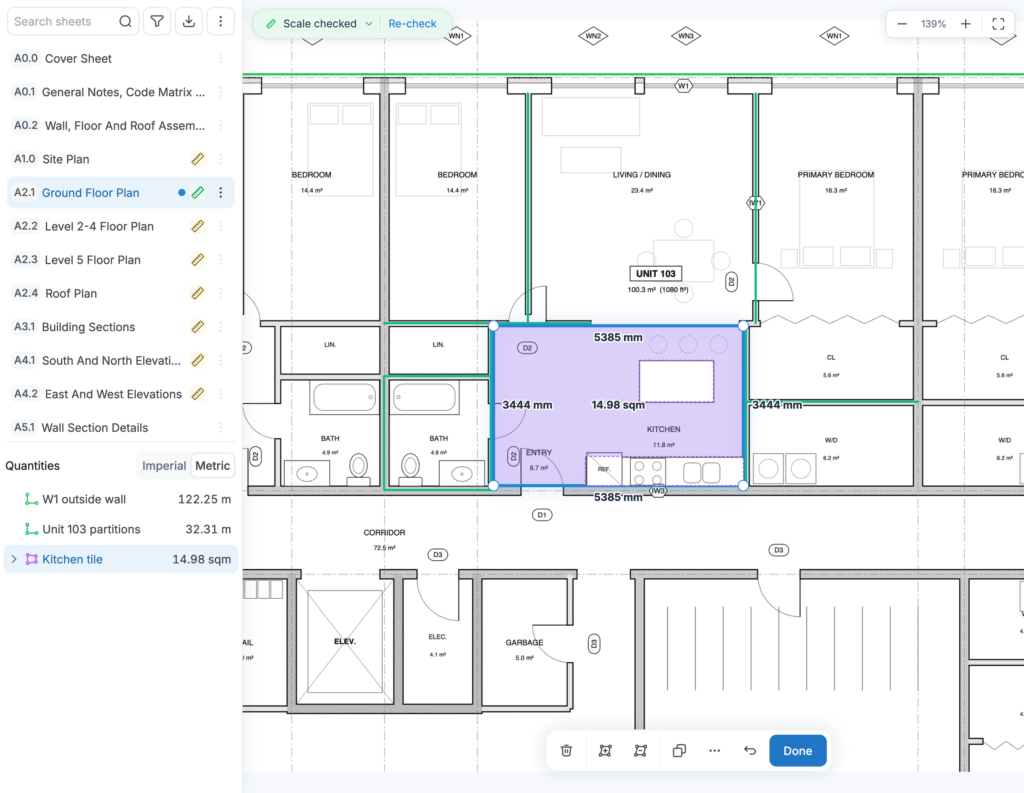
Area measures any surface: flooring, slabs, roofing, a brick face on an elevation.
- Click Area, then click round the room, or use Draw boxes (B) for a rectangle.
- Click Finish or press Enter, and name the area by the material that goes on it, such as Kitchen tile. Each material then adds up on its own line in Quantities.
- Select the area and click Cut out (R) to take out counters, an island, a tub or the windows on an elevation. The total drops with every cut.
Add area puts more rooms on the same measurement, under the same name.
Step 6: Count doors, windows and fixtures with Count
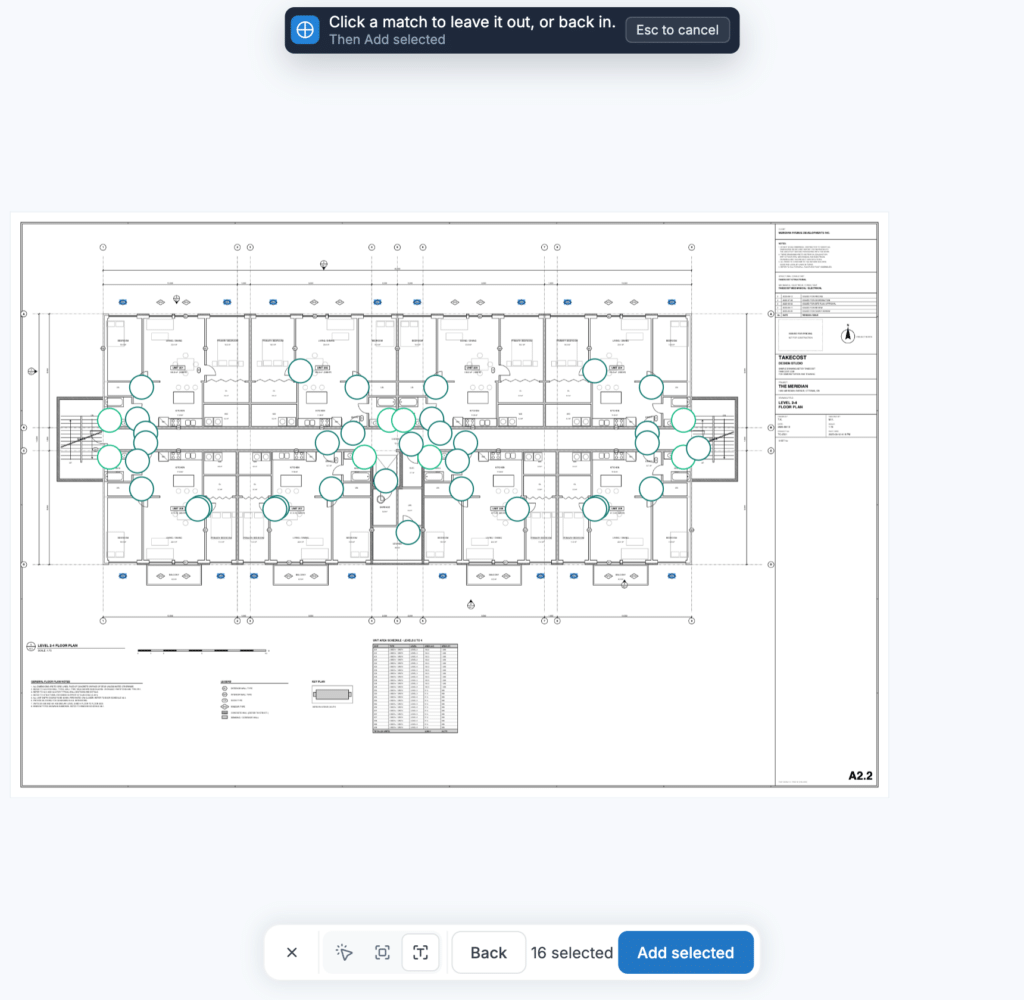
Count counts anything that repeats on a drawing, three ways:
- By hand: click each item. Good for a few items, or things with no tag or symbol.
- By symbol: box one symbol, and TakeCost finds the ones that look the same. Click any match you don’t want, such as the sample in a legend, to leave it out.
- By text: type a printed tag, such as a window tag, and Find picks out every one on the sheet.
Click Finish and name the count. Quantities lists it by name in EA (each).
Step 7: Turn a wall into materials with Smart Scopes
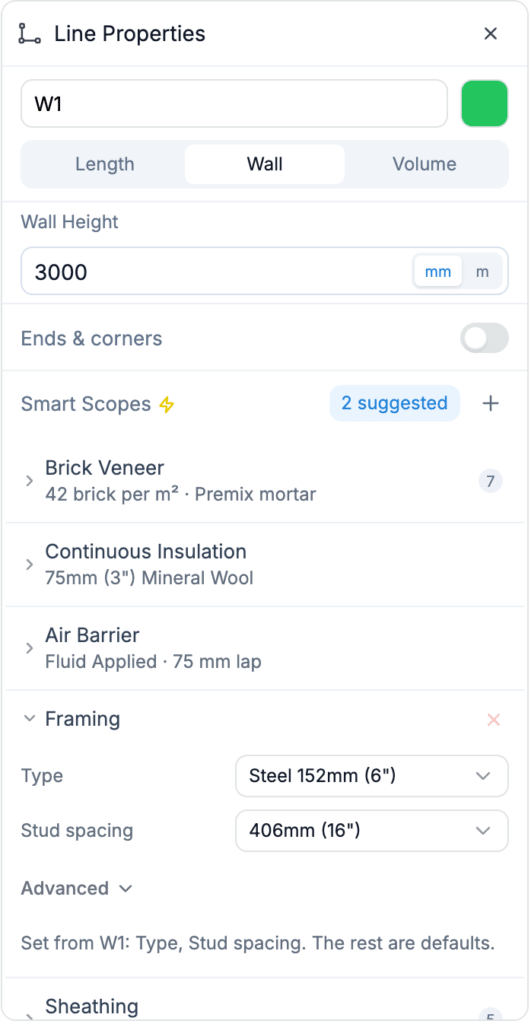
A Smart Scope is a material calculator attached to a measurement. It turns a measured wall into the materials you order, so you don’t count studs or bricks by hand.
- Click the wall to open its properties.
- Choose Wall and type the wall height.
- Under Smart Scopes, click Select suggested and add them. For a wall type it knows, TakeCost suggests the scopes from the wall’s assembly.
- Open each scope and check its options against the assembly on your drawings.
In Quantities, each scope lists what it works out: Framing, for example, gives the studs, with top and bottom track. Change the wall later and every scope recalculates.
Watch: Wall Properties and Smart Scopes (1:33)
Step 8: Mark up the drawing
Click Markup on the toolbar to draw on a sheet: cloud a change, draw with Pen or Pencil, highlight a label, add a Text Callout with an arrow, or leave a Comment for your team.
Markups are notes on the drawing only. They add nothing to Quantities or the estimate, so use Linear, Area and Count for anything you need a quantity for.
Step 9: Price your takeoff in the Estimate
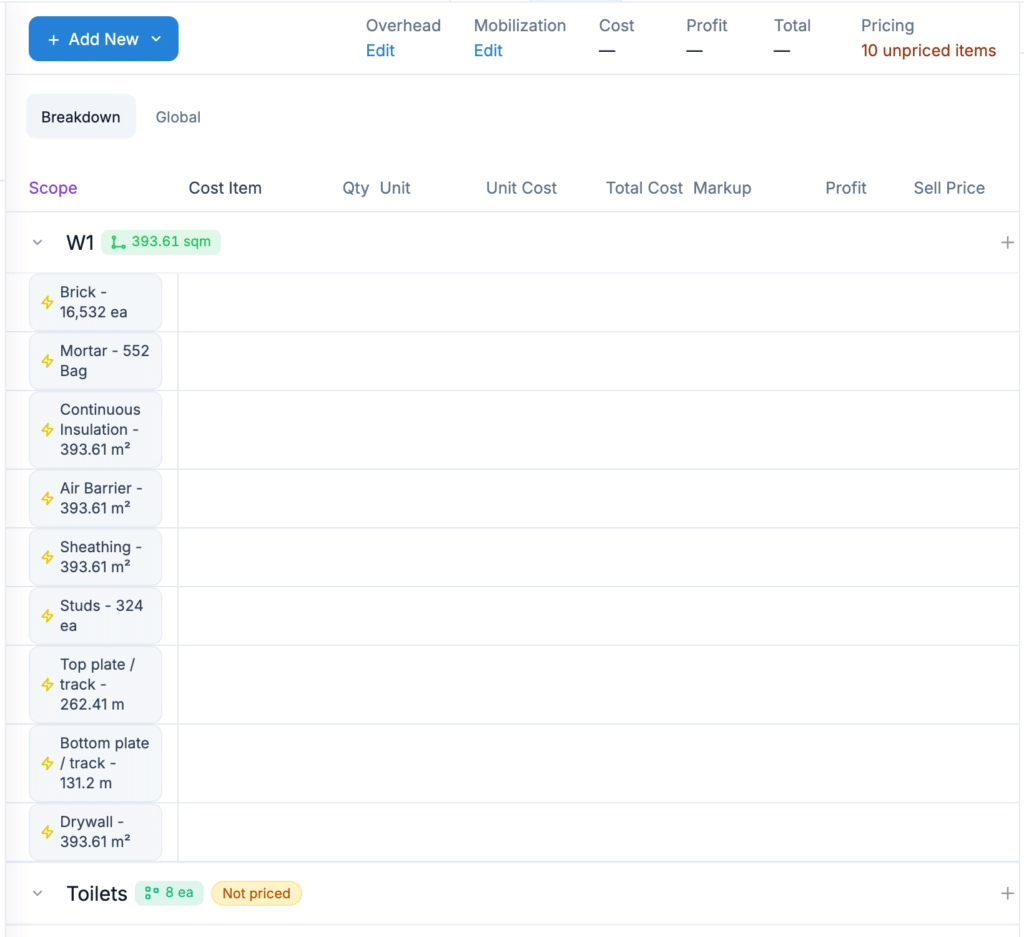
Click the Estimate tab, or Open Estimate under the list of what you measured. Every takeoff comes in with its quantity, and each Smart Scope output is its own line.
- The Assistant counts what still needs a price, for example “10 of 10 items are missing a price”. Click Add price, or hover over a line and click + Supply for the material or + Install for the labour.
- Smart Pricing Details fills in the item and supplier from your Catalog, works out the units you need from its coverage, and shows the cost. Click Apply.
- Add Overhead and a Mobilization charge, and general items for costs that aren’t on the drawings.
Cost, Profit and Total add up at the top. Change a measurement on the drawing, and its quantities and prices follow. To work in a spreadsheet, Export on the Sheets tab downloads the quantities as a CSV file.
Step 10: Build and download the proposal
Click the Proposal tab. The proposal’s scopes come from your priced Estimate lines, with the totals added up for you.
- Display: show each scope as Detailed line items, a Scope Price or a Lump Sum. Columns choose how much of the breakdown the client sees.
- Proposal Details: proposal number, dates, tax, discount and your company details and logo.
- Prepared For: your client. Save as new client keeps them for next time.
- Intro, Proposal Notes with your Inclusions and Exclusions, marked-up drawing pages and an Acceptance signature block.
Save a version for each revision, then click Download Proposal for the PDF. TakeCost doesn’t email the proposal; send the PDF to your client yourself.
FAQ
Do I need drawings to use TakeCost?
No. Choose Start from estimate when you create the project and build the estimate by hand. You can upload drawings to the same project later, and drawn quantities land in the same estimate.
Why should I check the scale if TakeCost reads it?
TakeCost reads the scale off the sheet, but a scale that’s off carries into every length and area. Checking it against a printed dimension takes a few seconds, and the ruler turns green when it’s checked.
What’s the difference between Linear, Area and Count?
Linear measures lengths, such as walls and pipe. Area measures surfaces, such as flooring and brick faces. Count counts items, such as doors, windows and fixtures.
Can I export my takeoff to Excel?
Yes. Export on the Sheets tab downloads your quantities as a CSV file, which opens in Excel or Google Sheets.
Try it on your next job
Create your TakeCost account and run your next set of drawings through these ten steps. Want a walkthrough first? Book a demo.
More TakeCost tutorials: the full playlist on YouTube · What is a construction takeoff? · Features